I have a profound appreciation for the traditional art of Japanese tattoos. When you look at a classic, sprawling piece—specifically one featuring a massive snake coiled through a background of dark waves and wind bars—the visual impact is always staggering.
The secret to that powerful visual impact isn’t just the bold black outlines. It is the masterful use of shading.
To create those soft, smoky, seamless grey gradients that give the snake its three-dimensional volume, the tattoo artist doesn’t buy fifty different bottles of grey ink. They only use one single bottle of pure, solid black.
They create the different shades by putting a few drops of that solid black ink into small plastic caps, and then diluting it with varying amounts of distilled water. The ink itself never changes. The pigment never changes. The only thing that changes is the ratio of water to pigment.
By adding more water, the visual “strength” of the ink becomes weaker, softer, and more transparent. By using less water, the ink remains dark, heavy, and aggressive.
For the first decade of my coffee-drinking life, I completely failed to understand that my morning mug operated on this exact same principle of dilution.
I was constantly frustrated because my coffee felt thin and watery, or alternatively, it tasted like a harsh, overwhelming punch to the throat. I kept changing my coffee beans, hoping to find a brand that magically tasted “just right.”
I was completely ignoring the water.
Here is the honest, highly scientific story of how I finally learned to control coffee strength, the massive difference between concentration and extraction, and how learning to mix my own “ink” completely revolutionized my mornings.
The Great Supermarket Myth
My inability to control the strength of my coffee started with a lie that is actively perpetuated by massive commercial coffee brands.
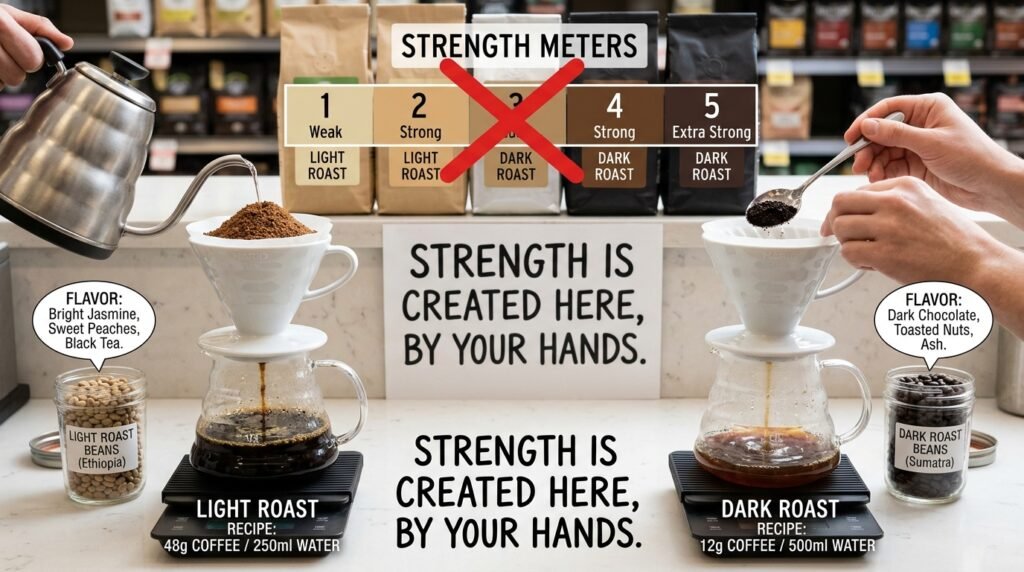
If you walk down the coffee aisle at any major grocery store, you will see bags labeled with “Strength Meters.” They usually feature a little graphic of coffee beans, ranging from a number 1 (Weak) to a number 5 (Extra Strong).
Without fail, the “Extra Strong” coffees are always pitch-black, oily, dark roasts. The “Weak” coffees are always light roasts.
This taught me a fundamentally incorrect lesson. I assumed that “strength” was a physical property of the coffee bean itself. I thought that if I wanted a powerful, heavy cup of coffee, I had to buy beans that had been burned to a crisp in the roasting machine.
This is an absolute culinary illusion.
The roast level of a coffee bean dictates its flavor profile, not its strength. A dark roast bean will taste like dark chocolate, toasted nuts, and ash. A light roast bean will taste like bright jasmine flowers, sweet peaches, and black tea.
You can brew an incredibly weak, watery cup of dark roast. And you can brew a terrifyingly strong, heavy, overwhelming cup of light roast.
Strength is not created in the roasting machine. Strength is created in your kitchen, by your hands.
Defining “Strength” (TDS)
To actually control the strength of my coffee, I had to learn what the word meant in a laboratory setting.
In the specialty coffee industry, strength is measured by a metric called Total Dissolved Solids, or TDS.
When you drink a standard cup of black filter coffee, you are not drinking a cup full of coffee. You are drinking a cup that is roughly 98.5 percent pure water, and only 1.5 percent dissolved coffee material.
That 1.5 percent is your TDS. That is the “strength” of your beverage.
If you increase that number to 2 percent, the coffee will feel incredibly heavy, syrupy, and intense on your palate. It will punch you in the mouth.
If you decrease that number to 1 percent, the coffee will feel thin, hollow, and watery, like a delicate herbal tea.
I realized that my job as a home brewer was exactly the same as the tattoo artist mixing their ink. I had to control the exact ratio of water to coffee material to achieve the perfect shade of flavor.
The Tool of Concentration: The Ratio
Once I understood the science of TDS, I realized why my old routine was producing such chaotic, unpredictable results.
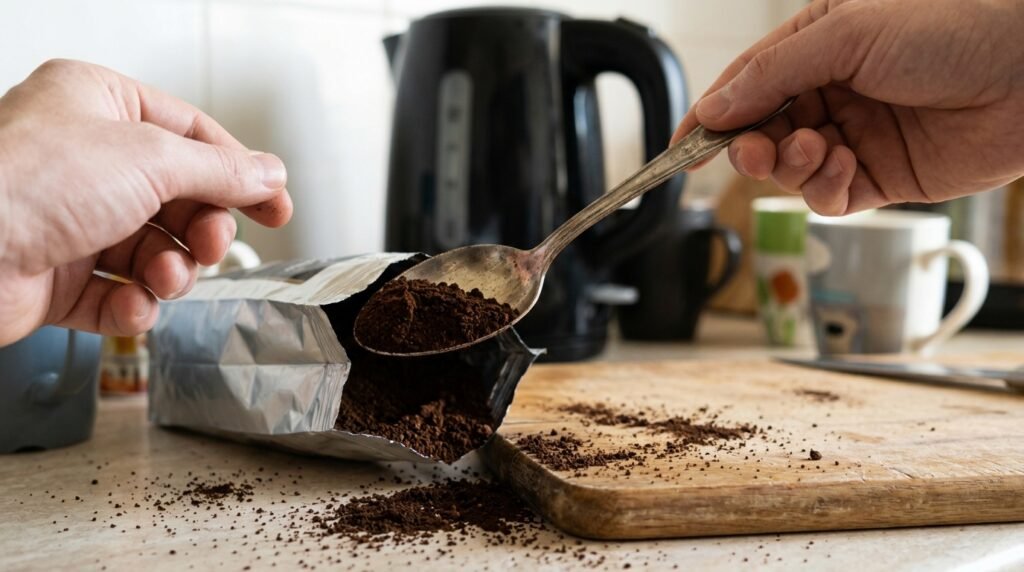
I was measuring my coffee beans using a random soup spoon. Some days I used three massive scoops; other days I used two flat scoops. I was pouring water out of my kettle until my mug simply looked full.
I was randomly guessing the dilution rate every single morning.
If you want to control the concentration of your coffee, you have to establish a strict mathematical baseline. You have to lock the ratio. Establishing this absolute foundation was exactly (The Day I Finally Got My Coffee Ratio Right), because it finally gave me a steering wheel to drive the extraction.
I bought a cheap digital kitchen scale. I stopped using the soup spoon and started weighing my coffee and my water in precise grams.
The industry standard “golden ratio” is 1:16. This means 1 gram of coffee for every 16 grams of water.
If I use 15 grams of ground coffee, I pour exactly 240 grams of hot water. This creates a beautifully balanced, medium-strength cup of coffee that usually sits right around that perfect 1.5 percent TDS mark.
How to Manipulate the Slider
The beauty of the digital scale is that it doesn’t restrict you; it liberates you. Once you have a locked baseline, you can start intentionally manipulating the math to suit your specific cravings.
If I wake up on a rainy morning and I am brewing a comforting, chocolatey Colombian coffee, I want it to feel heavy. I want high concentration.
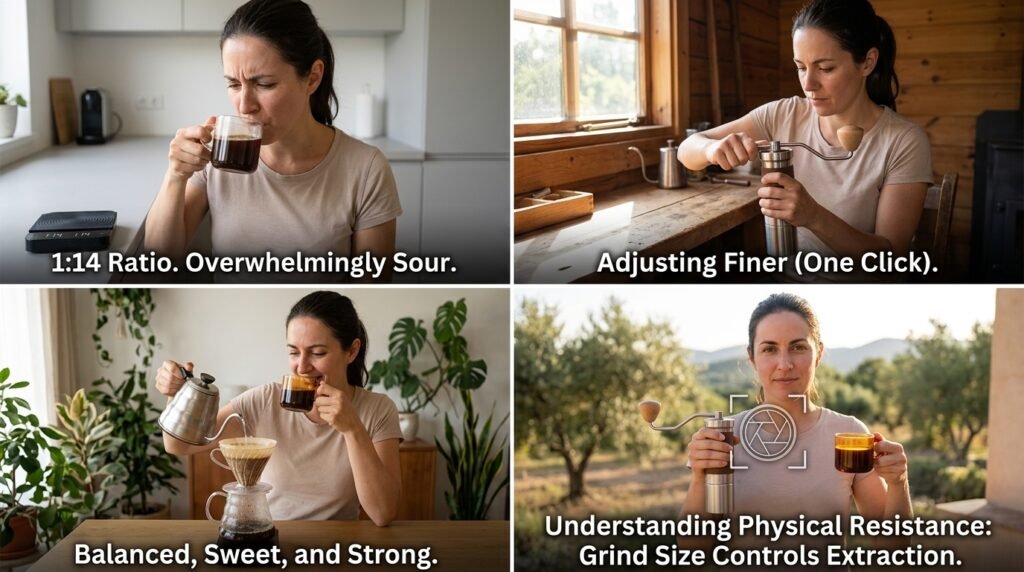
To achieve this, I simply change the ratio to 1:14. I use the same 15 grams of coffee, but I only pour 210 grams of water. By restricting the water, the resulting liquid is noticeably thicker, richer, and punches my palate with intense flavor.
If I am brewing a highly expensive, delicate, floral Ethiopian coffee, I don’t want it to be heavy. I want to taste the fragile, tea-like aromatics. I want low concentration.
To achieve this, I change the ratio to 1:17. I use 15 grams of coffee, but I pour 255 grams of water. The extra water slightly dilutes the heavy body, opening up the flavor profile and allowing the delicate jasmine and peach notes to shine through with absolute clarity.
I am no longer a victim of the beans. I am actively deciding how strong the coffee will be before the water even boils.
The Difference Between Strength and Extraction
As I started playing with my ratios, I ran into a very confusing, frustrating wall.
Sometimes, I would brew a cup of coffee at a strong 1:14 ratio. I expected it to be rich and heavy. But when I tasted it, it was incredibly strong, yet aggressively sour and salty. It tasted like concentrated lemon juice.
Other times, I would brew a weak 1:17 ratio. I expected it to be delicate and floral. But it tasted dry, ashy, and left a harsh, bitter metallic taste in the back of my throat.
This is when I learned the most difficult, advanced lesson in coffee brewing: Strength and Extraction are two completely different things.
Strength is simply how much coffee material is in the water.
Extraction is which specific flavors you pulled out of the coffee bean.
When hot water hits coffee grounds, it dissolves the sour fruit acids first. Then, it dissolves the sweet sugars. Finally, if it stays in contact with the beans too long, it dissolves the harsh, bitter tannins.
You can have a very strong cup of coffee that is sour (under-extracted). And you can have a very weak cup of coffee that is intensely bitter (over-extracted).
Learning to untangle these two separate variables in my mind was the exact solution to (Why My Coffee Always Tasted Weak (And How I Fixed It)). I had to stop confusing concentration with flavor balance.
The Tool of Extraction: Grind Size
If the Ratio (the scale) is the tool you use to control Strength, then the Grind Size (the grinder) is the tool you use to control Extraction.
If my strong 1:14 coffee tasted overwhelmingly sour, it meant the water was flowing through the coffee grounds too fast. It was only grabbing the fast-dissolving acids, completely missing the heavy sugars.
To fix this, I didn’t change my ratio. I simply adjusted my manual burr grinder one click finer.
Making the coffee particles smaller increases the surface area and physically slows down the flow of the water. The water has to work harder to get through the tightly packed sand. This extra contact time allows the water to melt the sweet sugars, perfectly balancing out the sourness while maintaining that heavy, concentrated strength.
Understanding this physical resistance is precisely (How Grind Size Affected My Coffee More Than I Expected). The grinder is the focus ring that makes the image sharp.
Conversely, if my weak 1:17 coffee tasted harsh, dry, and bitter, it meant the water was trapped. It was extracting too much, pulling out the bitter plant tannins.
To fix this, I adjusted my grinder one click coarser. The larger particles allowed the water to flow freely, escaping the coffee bed before the bitter tannins could dissolve. The resulting cup became beautifully sweet, delicate, and tea-like.
The Troubleshooting Matrix
Once you separate Strength (Ratio) from Extraction (Grind Size), you gain absolute culinary supremacy over your morning routine. You can diagnose and fix any bad cup of coffee using a simple mental matrix.
Scenario 1: The coffee feels heavy and thick, but it makes your jaw ache because it is so sour. Diagnosis: It is Strong, but Under-Extracted. The Fix: Keep your coffee-to-water ratio exactly the same. Grind your beans slightly finer next time to slow the water down and extract more sweetness.
Scenario 2: The coffee feels heavy and thick, but it tastes like burnt wood and dry aspirin. Diagnosis: It is Strong, and Over-Extracted. The Fix: Keep your ratio the same. Grind your beans slightly coarser next time to speed the water up and avoid the bitter tannins.
Scenario 3: The coffee feels like brown water, and it is painfully sour. Diagnosis: It is Weak, and Under-Extracted. The Fix: This is a double failure. Use slightly less water next time to increase the concentration, AND grind slightly finer to increase the extraction of the sugars.
Scenario 4: The coffee feels like brown water, but it leaves a harsh, dry, metallic bitterness in your throat. Diagnosis: It is Weak, and Over-Extracted. The Fix: Use slightly less water next time to bring the body back, AND grind slightly coarser so the water doesn’t pull out the bitter tannins.
Mixing Your Own Ink
We are culturally conditioned to accept whatever coffee is handed to us. If it tastes bad, we assume the barista messed up, or we assume we bought a bad bag of beans from the grocery store.
But when you brew manually in your own kitchen, you are the artist. You hold the bottle of black ink, and you hold the bottle of distilled water.
You do not have to settle for a weak, washed-out grey when you want a bold, heavy black. And you do not have to settle for a harsh, overpowering punch to the palate when you want a delicate, smooth gradient.
Stop buying coffee based on the misleading “Strength Meters” printed on the bags. Buy high-quality, freshly roasted beans based entirely on the flavors you want to experience.
Then, buy a digital scale. Buy a manual burr grinder.
Take control of your dilution rate, and master your contact time. When you finally learn how to separate concentration from extraction, you will never drink a disappointing cup of coffee again. You will sit at your kitchen counter, execute your math, and pour a masterpiece every single morning.

My name is Daniel Carter, I am 35 years old, and I live in the United States. I have been passionate about aquariums for many years, and what started as a simple hobby quickly became a lifelong interest in aquatic life, fish behavior, and responsible tank care.
Through TheBrightLance, I share real experiences, practical knowledge, and honest lessons learned from maintaining different types of aquariums. I enjoy testing equipment, studying fish behavior, improving maintenance routines, and helping beginners avoid common mistakes.
My goal is to make aquarism easier, more ethical, and more enjoyable for everyone — whether you are setting up your very first tank or looking to refine your techniques.