
My First Big Mistake
I’ll never forget the day I almost wiped out my entire aquarium. It was early in my aquascaping journey, and armed with a few online articles and a whole lot of enthusiasm, I thought I knew everything. Spoiler alert: I didn’t. I had a beautiful 20-gallon freshwater tank teeming with life. A school of neon tetras darted amongst the swaying java moss, a pair of graceful angelfish patrolled their territory, and a small army of corydoras catfish tirelessly scavenged the substrate. It was my pride and joy.
Then, disaster struck. I decided it was time for a “deep clean.” I read somewhere that a thorough cleaning was essential for maintaining a healthy aquarium. The article advocated for removing all the decorations, scrubbing the gravel, and doing a massive water change. Sounded good to me. I diligently followed the instructions, emptying nearly all the water from the tank. I scrubbed every inch of the gravel, rinsing away what I thought was just harmless debris. I even cleaned the filter with tap water, not realizing the delicate balance of bacteria I was destroying.
Within hours, the water turned cloudy. The fish started acting lethargic, gasping at the surface. The vibrant colors faded, replaced by a dull, sickly pallor. My heart sank. I knew something was terribly wrong. I desperately searched online forums for answers, finally realizing the gravity of my mistake. I had completely disrupted the nitrogen cycle, the delicate biological process that keeps an aquarium healthy. By removing all the beneficial bacteria, I had essentially poisoned my fish with their own waste.
It was a brutal lesson, one that cost me several fish. I managed to save some, but the experience left me scarred. It taught me that aquariums are delicate ecosystems, and that less is often more when it comes to maintenance. It also instilled in me a deep respect for the power of water changes – both their potential to heal and their capacity to harm.
The Right Way to Do Water Changes: A Beginner’s Guide
Okay, so you want to keep your fish happy and healthy? Regular water changes are non-negotiable. But after my initial disaster, I approached them with a newfound caution. I spent countless hours researching, experimenting, and learning from my mistakes. Here’s what I’ve learned over the past decade:
Frequency and Volume: Finding the Sweet Spot
The million-dollar question: how often and how much water should you change? There’s no one-size-fits-all answer, as it depends on several factors, including the size of your tank, the number of fish, and the type of filtration you have. However, a good starting point is a 25% water change every one to two weeks.
For heavily stocked tanks or tanks with less efficient filtration, you might need to increase the frequency to once a week. Conversely, lightly stocked tanks with excellent filtration can often get away with water changes every two weeks. It’s crucial to observe your fish and monitor your water parameters (ammonia, nitrite, and nitrate) to determine the optimal schedule for your specific aquarium.
The key is to remove accumulated nitrates, the end product of the nitrogen cycle, without disrupting the delicate balance of the ecosystem. Nitrates are less toxic than ammonia and nitrite, but they can still be harmful to fish in high concentrations. Regular water changes dilute the nitrate levels, keeping your fish healthy and preventing algae blooms.
I generally stick to a 25% water change every week for my main display tank. It’s a good balance between removing nitrates and minimizing stress on the fish. For my smaller, less populated tanks, I do a 25% change every other week.
The Importance of Temperature Matching
This is where I see a lot of beginners make mistakes. Imagine jumping from a hot shower into an ice-cold pool. That’s essentially what you’re doing to your fish if you don’t match the temperature of the new water to the old water.
Sudden temperature fluctuations can stress your fish, weaken their immune system, and even lead to shock or death. The ideal temperature difference is no more than 1-2 degrees Fahrenheit. I use a simple aquarium thermometer to measure the temperature of both the tank water and the new water before adding it. If the temperature difference is too great, I adjust the temperature of the new water by adding small amounts of hot or cold water until it matches.
Another tip: let the new water sit for a few hours before adding it to the tank. This allows it to reach room temperature and dissipate any chlorine or chloramine that may be present (more on that later).

Chlorine and Chloramine: The Silent Killers
Tap water is often treated with chlorine and chloramine to kill bacteria and other harmful microorganisms. While these chemicals are safe for humans, they are deadly to fish. They damage the gills, making it difficult for fish to breathe, and can also disrupt the beneficial bacteria in your filter.
Fortunately, removing chlorine and chloramine is relatively easy. You can use a commercially available water conditioner, which neutralizes these chemicals instantly. Simply add the recommended dosage to the new water before adding it to the tank. I always keep a bottle of water conditioner on hand; it’s a small price to pay for the health of my fish.
Some people advocate for letting tap water sit out for 24-48 hours to allow the chlorine to evaporate. While this can work for chlorine, it’s not effective for chloramine, which is much more stable. Therefore, using a water conditioner is the safest and most reliable method.
The Gravel Vacuum: More Than Just a Cleaning Tool
A gravel vacuum is an essential tool for performing water changes. It allows you to siphon water out of the tank while simultaneously cleaning the substrate. As you move the vacuum over the gravel, it sucks up debris, uneaten food, and fish waste. This helps to prevent the buildup of harmful toxins and maintain a clean and healthy environment for your fish.
When using a gravel vacuum, don’t bury it deep into the substrate. Instead, gently hover it just above the surface, allowing it to suck up the loose debris. Avoid disturbing the roots of your plants, as this can stress them and release harmful toxins into the water.
I like to divide my tank into sections and clean a different section each week. This prevents me from disturbing the entire substrate at once, which can disrupt the nitrogen cycle. It also gives the beneficial bacteria time to recover between cleanings.
Advanced Water Change Techniques
Once you’ve mastered the basics, you can start experimenting with more advanced water change techniques. These techniques can help you optimize your water parameters, improve the health of your fish, and create a more stable and thriving aquarium environment.
Drip Acclimation: A Gentler Approach
Drip acclimation is a slow and gradual method of introducing new water to your aquarium. It involves slowly dripping new water into the tank over a period of several hours, allowing your fish to gradually adjust to the changing water parameters.
This technique is particularly useful for sensitive fish, such as those from soft water environments, or for newly acquired fish that may be stressed from shipping. It minimizes the risk of shock and allows the fish to adjust to the new water chemistry at their own pace.
To drip acclimate, simply run an airline tubing from a bucket of new water to your aquarium. Tie a knot in the tubing to restrict the flow of water, or use an adjustable valve to control the drip rate. Aim for a drip rate of about one drop per second. Monitor the fish closely during the acclimation process and adjust the drip rate as needed.
Using RO/DI Water: Achieving Pristine Water Quality
Reverse osmosis/deionization (RO/DI) water is purified water that has been filtered to remove nearly all impurities, including minerals, chlorine, chloramine, and nitrates. Using RO/DI water for water changes can help you achieve pristine water quality and create a more stable and predictable environment for your fish.
RO/DI water is particularly useful for keeping fish that require soft water, such as discus and South American tetras. It also eliminates the risk of introducing harmful chemicals or contaminants from your tap water.
However, using RO/DI water also requires careful remineralization. RO/DI water is devoid of minerals, which are essential for the health of your fish and plants. You’ll need to add a commercially available remineralization product to the water before adding it to your tank.
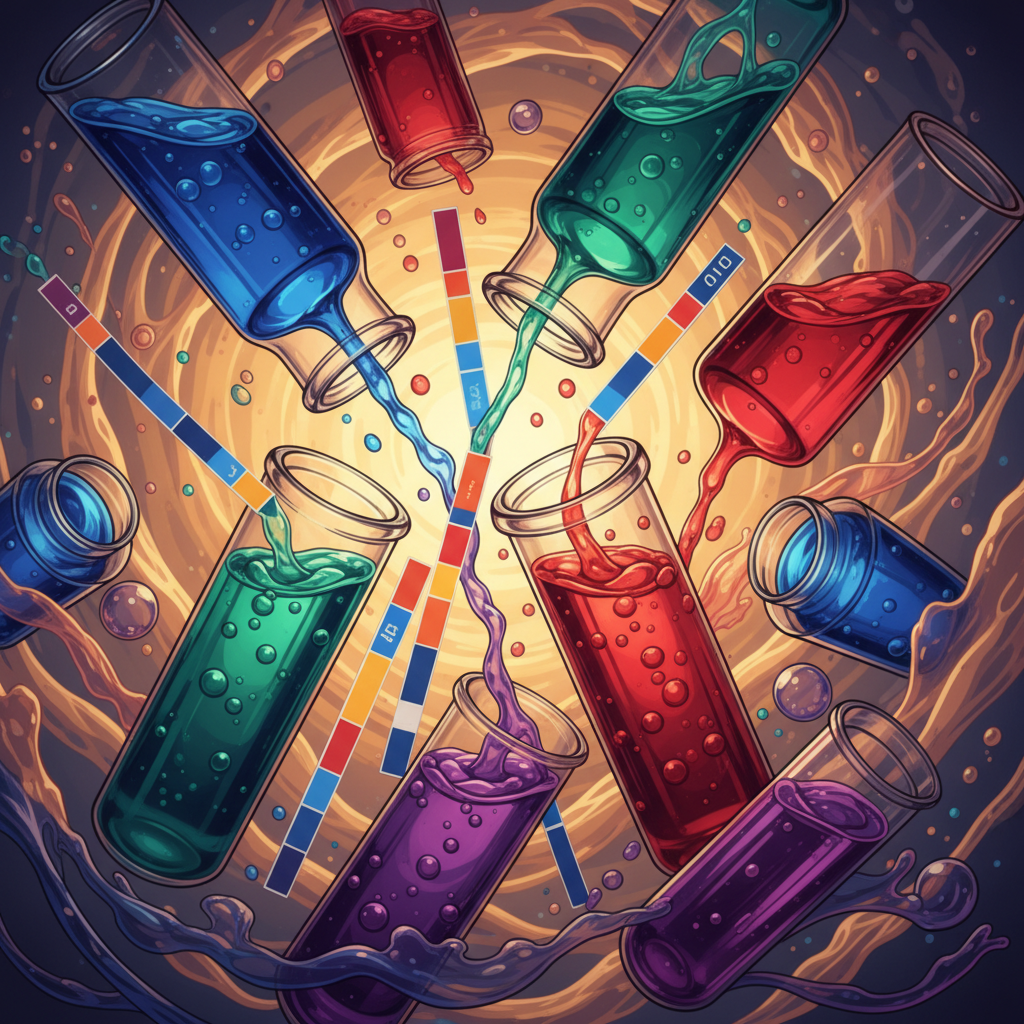
The Power of Water Testing
Regular water testing is crucial for understanding your aquarium’s chemistry and identifying potential problems before they become serious. By monitoring your water parameters, you can make informed decisions about water changes and other maintenance tasks.
There are several types of water testing kits available, ranging from simple test strips to more sophisticated liquid test kits. Test strips are convenient and easy to use, but they are generally less accurate than liquid test kits. Liquid test kits require more time and effort, but they provide more precise and reliable results.
I recommend testing your water at least once a week, especially if you’re new to the hobby. Pay close attention to ammonia, nitrite, and nitrate levels. High levels of ammonia or nitrite indicate a problem with the nitrogen cycle, while high levels of nitrate indicate the need for a water change.
Don’t just test the water; record the results. Keeping a log of your water parameters will help you track trends over time and identify potential problems early on. I use a simple spreadsheet to record my test results, along with any observations about my fish or plants.
Common Water Change Mistakes to Avoid
Even with the best intentions, it’s easy to make mistakes when performing water changes. Here are some common pitfalls to avoid:
Over-Cleaning the Tank
Remember my first big mistake? Over-cleaning the tank is a surefire way to disrupt the nitrogen cycle and harm your fish. Avoid removing all the decorations, scrubbing the gravel excessively, or cleaning the filter with tap water. These actions can kill the beneficial bacteria that are essential for maintaining a healthy aquarium.
Instead, focus on removing debris and uneaten food from the substrate, and perform regular water changes to dilute nitrate levels. Clean the filter only when it’s visibly clogged, and rinse the filter media in used tank water, not tap water.
Ignoring the Water Parameters
Performing water changes without testing your water is like driving a car without looking at the speedometer. You might be heading in the right direction, but you have no idea how fast you’re going. Ignoring the water parameters can lead to imbalances and problems that could have been easily avoided with regular testing.
Always test your water before and after performing a water change. This will help you track the effectiveness of your water changes and identify any potential issues. Pay close attention to ammonia, nitrite, nitrate, pH, and alkalinity.

Adding Water Too Quickly
Pouring a large amount of water into the tank all at once can stir up debris and stress your fish. It can also cause sudden changes in water chemistry, which can be harmful to sensitive species. Instead, add the water slowly and gradually, allowing your fish to adjust to the changing conditions.
I use a siphon hose to slowly drip the new water into the tank. This allows the fish to acclimate gradually and minimizes the risk of shock. You can also use a small pump to slowly pump the water into the tank.
Forgetting the Water Conditioner
This is a mistake that can have devastating consequences. As mentioned earlier, tap water contains chlorine and chloramine, which are toxic to fish. Forgetting to add water conditioner can quickly lead to illness or death.
Always keep a bottle of water conditioner on hand, and add the recommended dosage to the new water before adding it to the tank. Double-check the dosage to make sure you’re adding the correct amount. It’s better to err on the side of caution and add a little too much than not enough.
Water Changes and Specific Fish Needs
While the general principles of water changes apply to most freshwater aquariums, some fish species have specific needs that require special consideration.
Soft Water Fish
Fish like Discus, Cardinal Tetras, and certain types of Corydoras catfish thrive in soft, acidic water. For these fish, using RO/DI water and remineralizing it to achieve the desired parameters is crucial. Regular water changes are still essential, but the focus is on maintaining the specific water chemistry that these fish require.
When keeping soft water fish, it’s important to monitor the pH, KH (carbonate hardness), and GH (general hardness) regularly. Aim for a pH between 6.0 and 7.0, a KH below 4 dKH, and a GH below 6 dGH. You can use commercially available buffers and mineral supplements to adjust these parameters as needed.
Hard Water Fish
On the other hand, fish like African Cichlids and livebearers (Guppies, Mollies, Platies) prefer hard, alkaline water. For these fish, tap water is often suitable, but it’s still important to test the water parameters and make adjustments as needed. Regular water changes help to maintain the high pH and mineral content that these fish require.
When keeping hard water fish, aim for a pH between 7.5 and 8.5, a KH above 8 dKH, and a GH above 12 dGH. You can use crushed coral or aragonite substrate to help maintain these parameters.

Brackish Water Fish
Brackish water fish, such as Figure Eight Puffers and Monos, require a mix of freshwater and saltwater. Maintaining the correct salinity is crucial for their health. Regular water changes involve adding the appropriate amount of marine salt to the new water to achieve the desired salinity level.
Use a hydrometer or refractometer to measure the salinity of the water. Aim for a specific gravity between 1.005 and 1.010, depending on the specific needs of the fish. It’s important to use marine salt specifically designed for aquariums, not table salt.
The Long-Term Benefits of Proper Water Changes
Water changes are not just a chore; they are an investment in the health and longevity of your aquarium. By consistently performing regular and proper water changes, you can create a thriving and beautiful environment for your fish to flourish.
I’ve seen firsthand the difference that proper water changes can make. My aquariums are healthier, my fish are more vibrant, and I experience fewer problems with algae and disease. It’s a small effort that pays off in big ways.
So, learn from my early mistakes, embrace the power of water changes, and enjoy the rewarding experience of keeping a healthy and thriving aquarium. It’s a journey of continuous learning, but the results are well worth the effort. Now, go forth and change some water!
My name is Daniel Carter, I am 35 years old, and I live in the United States. I have been passionate about aquariums for many years, and what started as a simple hobby quickly became a lifelong interest in aquatic life, fish behavior, and responsible tank care.
Through TheBrightLance, I share real experiences, practical knowledge, and honest lessons learned from maintaining different types of aquariums. I enjoy testing equipment, studying fish behavior, improving maintenance routines, and helping beginners avoid common mistakes.
My goal is to make aquarism easier, more ethical, and more enjoyable for everyone — whether you are setting up your very first tank or looking to refine your techniques.