
The Hidden Costs of Cutting Corners on Aquarium Gear
Let’s face it, starting an aquarium can feel like jumping into a money pit. Between the tank itself, the fish, the decorations, and the seemingly endless list of “must-have” gadgets, the expenses can quickly add up. And that’s where the temptation to cut corners creeps in. I’ve been there – trust me. I remember my first tank, a modest 20-gallon community setup. I was so eager to get started that I skimped on some essential equipment, thinking I could always upgrade later. Boy, was I wrong. Those initial “savings” ended up costing me far more in the long run – not just in dollars, but also in frustration, dead fish, and countless hours of extra maintenance.
Over the years, I’ve learned that investing in quality equipment from the start is almost always the better approach. It’s not just about avoiding breakdowns or malfunctions; it’s about creating a stable, healthy environment for your fish and making your life as an aquarist significantly easier. Today, I want to share some of the most common equipment mistakes I’ve made (and seen others make) that can turn aquarium maintenance into a real nightmare.
Overlooking the Importance of Filtration
The “Good Enough” Filter: A Recipe for Disaster
If there’s one piece of equipment you shouldn’t skimp on, it’s the filter. Your filter is the heart of your aquarium, responsible for removing waste, maintaining water clarity, and providing a home for beneficial bacteria that are essential for the nitrogen cycle. A filter that’s too small or poorly designed simply can’t handle the bioload of your tank, leading to ammonia and nitrite spikes that are toxic to fish. I remember one instance where I bought a supposedly “rated” filter for my tank size, but it became evidently useless once the fish grew a bit bigger. It simply couldn’t keep up with the waste production.
I initially bought a hang-on-back filter that was supposedly rated for a 30-gallon tank. At the time, I only had a few small fish, so I figured it would be fine. However, as my fish grew and I added a few more, the water quality started to decline rapidly. Algae blooms became a constant problem, and my fish started showing signs of stress. It wasn’t until I upgraded to a larger canister filter that I realized just how inadequate my original filter was. The difference in water clarity and fish health was night and day.
Canister vs. Hang-On-Back: Choosing the Right Type
The type of filter you choose also matters. Hang-on-back (HOB) filters are generally more affordable and easier to install, making them a popular choice for beginners. However, they typically have a lower flow rate and less media capacity than canister filters. Canister filters, on the other hand, offer superior filtration and are better suited for larger or heavily stocked tanks. They also allow for more customization of filter media, allowing you to tailor your filtration to the specific needs of your aquarium.
For example, if you have a planted tank, you might want to use a filter media that removes nitrates, as high nitrate levels can inhibit plant growth. Or, if you have a tank with messy fish like goldfish, you’ll need a filter with a high flow rate and plenty of mechanical filtration to remove solid waste. In my experience, investing in a quality canister filter is almost always worth the extra cost, especially if you plan on keeping your aquarium for the long term.

Ignoring the Importance of a Reliable Heater
The Fluctuating Temperature Nightmare
Maintaining a stable water temperature is crucial for the health and well-being of your fish. Fish are cold-blooded animals, meaning their body temperature is directly influenced by the temperature of their surroundings. Sudden temperature fluctuations can stress your fish, weaken their immune system, and make them more susceptible to disease. A cheap, unreliable heater can lead to wild temperature swings, especially in colder climates or during power outages. I have lost some fish due to this. You might think that something this simple is no big deal, but the inverse is true.
I learned this lesson the hard way when my old heater malfunctioned during a particularly cold winter night. I woke up to find the water temperature had plummeted to the low 60s, and several of my fish were lying listlessly at the bottom of the tank. I managed to save most of them, but the experience was a wake-up call. I immediately replaced my old heater with a high-quality, adjustable model with a built-in thermostat. I also invested in a backup heater in case of emergencies.
Wattage Woes: Choosing the Right Size Heater
Choosing the right wattage heater for your tank is also important. A heater that’s too small won’t be able to maintain the desired temperature, while a heater that’s too large can overheat the water. As a general rule of thumb, you should aim for 3-5 watts per gallon of water. However, this is just a guideline, and you may need a larger heater if you live in a colder climate or if your tank is located in a drafty area. It’s always better to err on the side of caution and choose a slightly larger heater than you think you need.
Also, consider the placement of your heater. It should be placed in an area of high water flow, such as near the filter outlet, to ensure that the heat is evenly distributed throughout the tank. Avoid placing the heater near the substrate, as this can create hot spots and potentially burn your fish. A good-quality thermometer is also essential for monitoring the water temperature and ensuring that your heater is working properly. I now have two thermometers in each tank, for extra security.
Cheap Lighting: A Recipe for Algae and Disappointed Plants
Beyond Illumination: The Role of Light in Aquarium Health
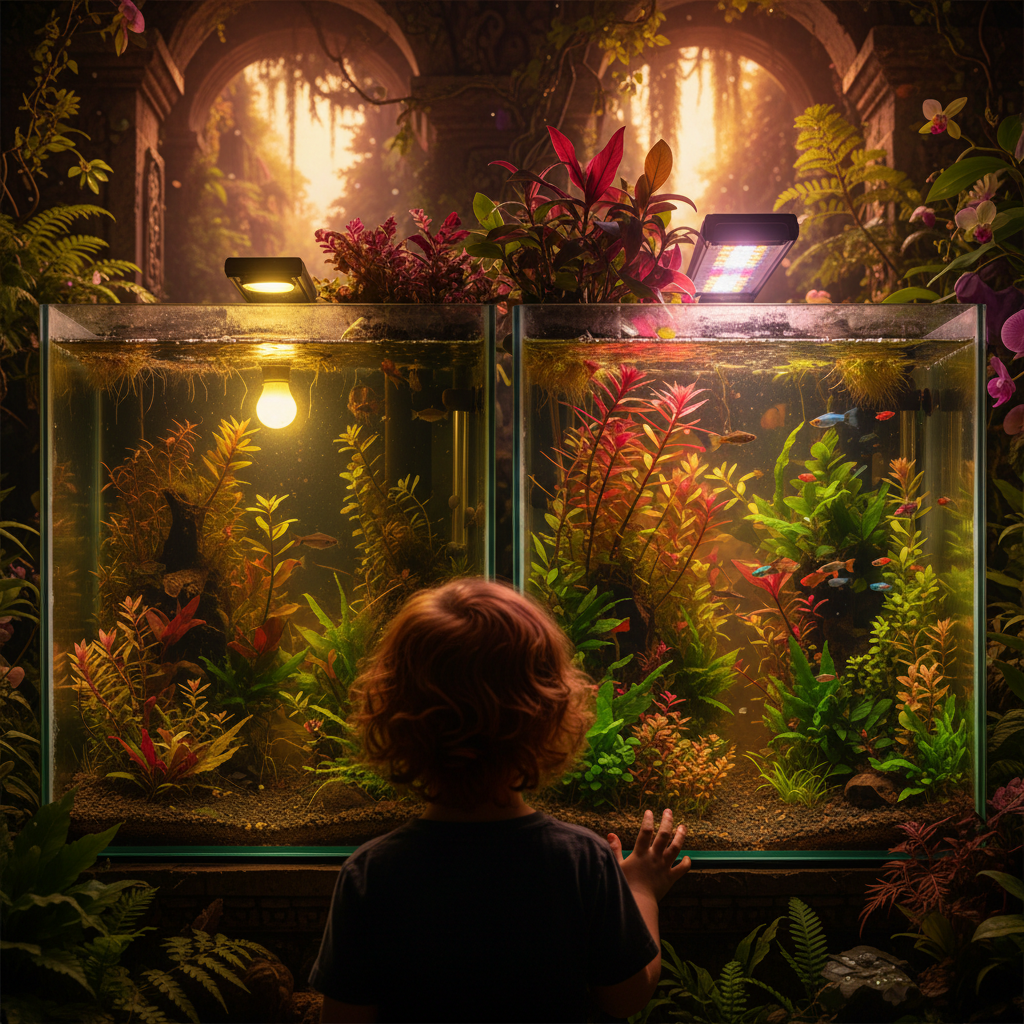
While lighting might seem like a purely aesthetic choice, it plays a crucial role in the health of your aquarium ecosystem. For planted tanks, proper lighting is essential for photosynthesis, the process by which plants convert light energy into chemical energy. Inadequate lighting can lead to stunted plant growth, nutrient deficiencies, and even plant death. Even in non-planted tanks, lighting affects fish behavior and can influence algae growth. A cheap, low-quality light fixture can produce the wrong spectrum of light, leading to excessive algae growth and a less-than-appealing aquarium. Algae is no fun, trust me!
I made the mistake of buying a cheap fluorescent light fixture for my first planted tank. I thought it would be sufficient for the low-light plants I was planning to keep. However, the plants never thrived, and I was constantly battling algae. It wasn’t until I upgraded to a high-quality LED light fixture that I saw a significant improvement in plant growth and a reduction in algae. The difference in light quality was remarkable.
LED vs. Fluorescent: Making the Right Choice
LED lighting has become increasingly popular in the aquarium hobby due to its energy efficiency, long lifespan, and ability to produce a wide range of light spectrums. LED fixtures are also generally more adjustable than fluorescent fixtures, allowing you to customize the light intensity and spectrum to the specific needs of your plants. While LED fixtures may be more expensive upfront, they can save you money in the long run due to their lower energy consumption and longer lifespan. I find that they are also a bit more secure and much less likely to cause any problems in the long term.
When choosing a light fixture, consider the size of your tank, the type of plants you want to keep, and the desired light intensity. Low-light plants like java fern and anubias can thrive under moderate lighting, while high-light plants like stem plants and carpeting plants require more intense lighting. A PAR (Photosynthetically Active Radiation) meter can be used to measure the light intensity at different depths in your aquarium, allowing you to fine-tune your lighting setup for optimal plant growth.
Ignoring the Power of a Proper Substrate
More Than Just Gravel: The Role of Substrate in Aquarium Health
The substrate, the material that lines the bottom of your aquarium, plays a more important role than you might think. It not only provides a surface for beneficial bacteria to colonize but also influences water chemistry and provides nutrients for plants. A cheap, low-quality substrate can leach harmful chemicals into the water, create anaerobic zones that produce toxic gases, and fail to provide adequate support for plant roots. I once used some cheap gravel that I bought at a garage sale. It looked harmless enough, but it quickly turned my water cloudy and made it difficult to maintain stable water parameters.
I eventually replaced the gravel with a high-quality aquarium substrate that was specifically designed for planted tanks. The difference was immediately noticeable. The water cleared up, my plants started to thrive, and my fish seemed happier and more active. I realized that the substrate is not just a decorative element; it’s an essential component of a healthy aquarium ecosystem.
Choosing the Right Substrate for Your Tank
The type of substrate you choose will depend on the type of aquarium you have. For planted tanks, a nutrient-rich substrate like aquasoil or laterite is ideal. These substrates provide essential nutrients for plant growth and help to buffer the water pH. For non-planted tanks, gravel or sand are good options. However, it’s important to choose a gravel or sand that is specifically designed for aquariums. Avoid using gravel or sand from your backyard, as it may contain harmful chemicals or bacteria.
Also, consider the grain size of your substrate. Fine sand is generally better for bottom-dwelling fish like corydoras, as it’s easier for them to sift through. Coarse gravel is better for promoting water flow and preventing anaerobic zones. Regardless of the type of substrate you choose, it’s important to rinse it thoroughly before adding it to your aquarium to remove any dust or debris.
Skimping on Essential Testing Equipment
The Invisible Threat: Why Regular Water Testing is Crucial
You can’t see ammonia, nitrite, or nitrate, but they can be deadly to your fish. Regular water testing is essential for monitoring water quality and detecting potential problems before they become serious. Skimping on testing equipment like test kits or a digital meter can leave you in the dark about the health of your aquarium. I used to rely solely on visual cues to determine water quality. If the water looked clear and the fish seemed happy, I assumed everything was fine. However, I soon learned that appearances can be deceiving. The water can look crystal clear while still containing high levels of harmful toxins.
I once had a tank crash because I didn’t realize that my ammonia levels were spiking. I lost several fish before I finally figured out what was going on. After that experience, I made it a point to test my water regularly using a reliable test kit. I also invested in a digital meter for measuring pH and TDS (Total Dissolved Solids). These tools have allowed me to catch potential problems early and take corrective action before they harm my fish.
Liquid Test Kits vs. Digital Meters: Pros and Cons
Liquid test kits are generally more affordable and accurate than digital meters, but they can be time-consuming and require some practice to use properly. Digital meters are more convenient and easier to use, but they can be more expensive and require regular calibration. I personally prefer to use a combination of both. I use liquid test kits for routine water testing and digital meters for quick spot checks. No matter which type of testing equipment you choose, it’s important to follow the instructions carefully and keep your equipment clean and well-maintained.
It’s also a good idea to keep a log of your water parameters so you can track changes over time and identify any trends. This can be especially helpful for troubleshooting problems and making informed decisions about water changes and other maintenance tasks. In my experience, regular water testing is one of the most important things you can do to ensure the health and longevity of your aquarium.

Neglecting the Importance of a Good Gravel Vacuum
The Detritus Dilemma: Why You Need to Clean Your Substrate
Over time, uneaten food, fish waste, and decaying plant matter accumulate in the substrate, forming a layer of detritus. This detritus can not only make your aquarium look unsightly but also release harmful toxins into the water and create anaerobic zones. A good gravel vacuum is essential for removing this detritus and keeping your substrate clean. I used to think that gravel vacuuming was a chore that could be skipped occasionally. However, I soon realized that it’s an essential part of maintaining a healthy aquarium. Neglecting to vacuum your gravel can lead to a buildup of harmful toxins, which can stress your fish and make them more susceptible to disease.
I once had a tank that was plagued by constant algae blooms and unexplained fish deaths. I couldn’t figure out what was going on. It wasn’t until I started vacuuming my gravel regularly that the problems disappeared. I realized that the detritus buildup in my substrate was the root cause of my problems. By removing the detritus, I was able to improve water quality and create a healthier environment for my fish.
Choosing the Right Gravel Vacuum for Your Tank
There are many different types of gravel vacuums available, ranging from simple siphon tubes to battery-powered models. The type of gravel vacuum you choose will depend on the size of your tank and your personal preferences. For smaller tanks, a simple siphon tube is usually sufficient. For larger tanks, a battery-powered gravel vacuum can make the job much easier. When vacuuming your gravel, be careful not to disturb the substrate too much, as this can release harmful toxins into the water. Work in small sections and avoid vacuuming too deeply. It’s also a good idea to avoid vacuuming the entire substrate at once, as this can disrupt the beneficial bacteria colonies that live in the substrate.
I usually vacuum about one-third of my substrate during each water change. This allows me to remove the detritus without disrupting the beneficial bacteria. I also make sure to rinse my gravel vacuum after each use to prevent the buildup of debris. In my experience, regular gravel vacuuming is one of the most effective ways to maintain a clean and healthy aquarium.
Underestimating the Value of a Reliable Timer
Consistency is Key: Why Automated Lighting Matters
Maintaining a consistent photoperiod (the amount of time your aquarium lights are on each day) is crucial for plant growth, algae control, and fish health. A reliable timer can automate your lighting schedule, ensuring that your lights turn on and off at the same time each day. This can help to prevent algae blooms, promote healthy plant growth, and reduce stress on your fish. I used to manually turn my aquarium lights on and off each day. This was fine when I was home, but it became a problem when I went on vacation or had to work late. My lighting schedule became inconsistent, which led to algae blooms and stressed-out fish.
I eventually invested in a simple digital timer for my aquarium lights. This allowed me to automate my lighting schedule and ensure that my lights turned on and off at the same time each day. The difference was immediately noticeable. My algae problems disappeared, my plants started to thrive, and my fish seemed much happier and more relaxed. I realized that a reliable timer is an essential tool for any serious aquarist.

Choosing the Right Timer for Your Needs
There are many different types of timers available, ranging from simple mechanical timers to sophisticated digital timers with multiple programmable settings. The type of timer you choose will depend on your budget and your specific needs. Mechanical timers are generally more affordable, but they can be less accurate and less reliable than digital timers. Digital timers are more expensive, but they offer greater accuracy and more features. When choosing a timer, make sure to select one that is compatible with your lighting system and that can handle the wattage of your lights. It’s also a good idea to choose a timer with a battery backup in case of power outages.
I personally prefer to use digital timers with multiple programmable settings. This allows me to customize my lighting schedule to the specific needs of my plants and fish. For example, I can program my lights to gradually ramp up in the morning and gradually dim in the evening to simulate sunrise and sunset. This can help to reduce stress on my fish and create a more natural environment. In my experience, a reliable timer is a small investment that can make a big difference in the health and appearance of your aquarium.
The Long-Term Payoff of Quality Gear
In the end, the “cheap” equipment I initially bought ended up costing me more time, money, and stress than if I had just invested in quality gear from the start. Replacing faulty equipment, treating sick fish, and battling algae blooms are all expenses that can be avoided by choosing the right equipment from the beginning. Moreover, the peace of mind that comes with knowing you have reliable equipment that’s designed to last is priceless. Building a thriving aquarium is a marathon, not a sprint. Investing in quality equipment is an investment in the long-term health and beauty of your underwater world.
My name is Daniel Carter, I am 35 years old, and I live in the United States. I have been passionate about aquariums for many years, and what started as a simple hobby quickly became a lifelong interest in aquatic life, fish behavior, and responsible tank care.
Through TheBrightLance, I share real experiences, practical knowledge, and honest lessons learned from maintaining different types of aquariums. I enjoy testing equipment, studying fish behavior, improving maintenance routines, and helping beginners avoid common mistakes.
My goal is to make aquarism easier, more ethical, and more enjoyable for everyone — whether you are setting up your very first tank or looking to refine your techniques.